Putting SSH Public Key Authentication to Work
If you use SSH (Secure SHell) to remotely access machines, then SSH public key authentication is a convenient way to log into remote hosts. without having to provide any credentials. And it’s very easy to set up.
The following will work on almost any modern Unix-like system, provided the necessary programs are available. (Windows version provided below).
First, you must create a public/private keypair, which you can do by issuing the ssh-keygen command at the command prompt:
ssh-keygen
For now, just press Enter at the prompts. This generates two files in your ~/.ssh directory: id_rsa and id_rsa.pup, containing an RSA private and public key respectively. (You can specify DSA instead with the -t dsa option for the ssh-keygen command).
Now you must copy the public key into the ~/.ssh/authorized_keys file of the remote user. To do this, you can issue the following commands:
scp .ssh/id_rsa.pub user@remotehost:~
ssh user@remotehost "cat id_rsa.pub >> .ssh/authorized_keys"
The first command uses scp (secure copy, which is based on SSH) to copy the file with the public key to the users home directory on the remote server. (You must obviously substitute user and remotehost with your own values).
The second command uses ssh issue a command remotely to append the contents of the public key file that you copied to the remote user’s authorized_keys file.
(Note that the first time you use any SSH-based command (ssh, scp or sftp) to access the remote server, you will be prompted to add the remote system’s host key to your local .ssh/known_hosts file. This key is checked on subsequent connections as a security measure to ensure that the remote host is still in fact the same remote host).
You’re done. Now, to test the authentication, use ssh to connect to the remote host:
ssh user@remotehost
If all went well, you should be logged on the remote host without any further ado. If you are still prompted for a password, you need to check whether the ssh daemon on the remote host is set up to allow public key authentication. (Type man sshd_ config to read the documentation and look for PubkeyAuthentication and RSAAuthentication in the man page).
That’s it! You’re good to go! Now let’s talk about security for a minute:
While the above method is quick and easy, you are advised to further encrypt your private key with a passphrase. (You are prompted for it when you run ssh-keygen, but you can leave it blank, and the key will not be encrypted). The reason is that if a malicious person gets hold of your private key, they could gain access to the servers on which you have been authenticated with the above method.
If you encrypt your private key, you will be prompted for the passphrase when ssh tries to use it to authenticate you. This seems quite counterproductive, when the whole point was that you shouldn’t have to provide any passwords to connect. For this reason, there exists ssh-agent.
The ssh-agent program runs in the background and caches unencrypted keys, so that when ssh connects, it queries ssh-agent for your (unencrypted) private key. You add private keys to ssh-agent using ssh-add. When you do this, you are prompted once for the passphrase, and after that, the key is cached by ssh-agent, and is readily available for ssh.
For details on how to set up ssh-agent to run on startup, I recommend this article, which forms part of a series on IBM Developerworks by Gentoo founder Daniel Robbins.
You can also set up SSH public key authentication on Windows, which I will show you how to do now.
Probaby the de facto standard ssh client on Windows is the excellent Putty. I usually copy the executables to C:\Windows\System32, because I frequently access them from the command line.
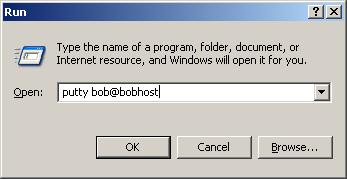
With the Putty executables in your path, you can ssh (yes, it is a verb, like google!) to a remote server as easily as WinKey+R and ssh [<user>@]remotehost :

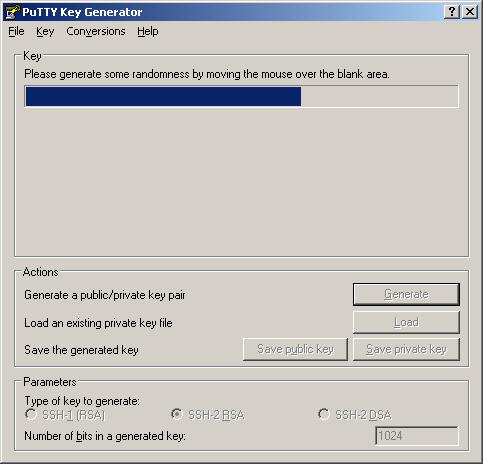
Putty comes with equivalents for the unix tools to generate keys (puttygen), copy files (pscp and psftp) and also has an authentication agent (pageant). To generate a private/public key pair, run puttygen and click the Generate button. Move your mouse over the blank area to generate some randomness that will be used in generating your keys.

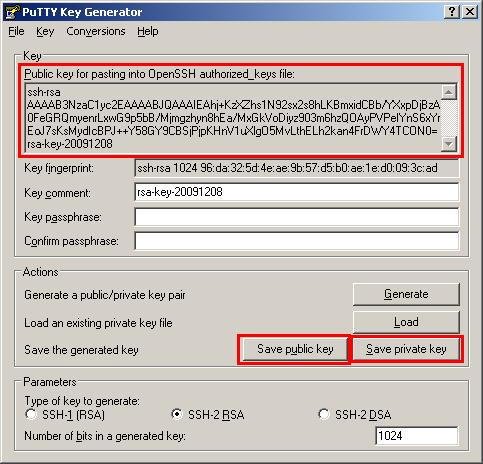
When the keys have been generated, you can enter a passphrase and then copy the public portion for appending to a remote authorized_keys file, and also save the private and public keys to your drive.

You can very easily access and edit the remote authorized_keys file in question by using WinSCP, which provides a graphical frontend to Putty’s pscp and psftp (or use NetDrive as per my last article).
Finally, start the authentication agent by running pageant. You should see an icon of a computer with a hat appearing in your system tray:
![]()
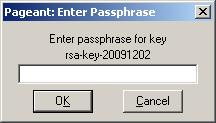
Right-click on the icon and choose Add Key . In the file open dialog that comes up, you can choose the private key file that you previously generated. If you entered a passphrase at the time, you will be prompted with a dialog to enter it.

With the agent running, if you now start a new remote session, Putty will try and obtain the cached unencrypted private key from the agent, avoiding you having to supply a password.
Well, that’s pretty much all there is to it!
Oh, and if you are looking for an SSH server on Windows, you could possibly use WinSSHD. I got annoyed with it after two minutes because of popups coming up for every single event (though I’m sure you can switch it off). It’s free for personal use, but will cost you otherwise. Other solutions I have seen are based on Cygwin, but I have had such trouble with different versions of the Cygwin dll on my machine that I am wary of going that route.
For more information on SSH public key authentication, you might like to read this article. To learn more about public key cryptography, read this Wikipedia article.
Leave a Reply